Sunday, December 16, 2018

It has been such a long time...

I still enjoy working with needle and thread and want to post some of my newer projects.


Thursday, February 27, 2014

Hanah Silk Lamp Shades

I absolutely love designing with Hanah silk ribbon and wanted to share a project I've just recently completed.  I have two vintage glass lamps mounted on marble stands.  The shades were worn and discolored so I removed the fabric leaving only the wire frame.

I've taken six coordinating shades of Hanah silk ribbon, along with vintage lace and remade my shades.  The rolled roses are made with the same silk ribbon and  I've scattered rhinestone pins and chandeliers crystals  along the top and base of the shade.

This was an enjoyable project and I'm really pleased with the results.  I've used a low watt florescent bulb and it is lovely shining through the lace pattern.

The velvet leaves add a special touch of color to the design and the rhinestone pins and crystal chandelier babbles add the perfect sparkle with the reflection from the light.  I love making roses but I'm not sure I love making this many.

Many thanks to my "crazy quilt sisters" for sharing their lace, rhinestones, and chandeliers crystals.  I couldn't have done it without you!

Sunday, February 23, 2014

Lovely New Tote

I love well-designed and beautiful bags!  One of my "crazy quilt sisters" recently purchased the large size and I loved it.  Needless to say, I couldn't rest until I had one of my very own.  Now that I have the medium, I'm wanting the large to carry my projects in.  We are never satisfied, are we?

Becky Feeley is the Founder of Texas Carpet Baggers.  Please take a look at all the lovely bags she has created.

I love the Ribbon and Roses fabric and also the arrangement of the inside pockets.  You can have a well-organized bag with all your content arranged perfectly.

By the way, I did order the large size.  I just couldn't resist.  Now I will have a perfect tote for my current crazy quilt project.


Sunday, June 23, 2013

Still Fascinated with Wire

I'm still fascinated with wire work so I thought I would post several of my latest projects.  One of the neatest things I have discovered through a friend is the Lazee Daizee Viking Knit tool.  Created by Stephanie Eddy, this wonderful tool makes the most beautiful chains.  Check out Stephanie's site for a youtube video and demonstration.  You can order directly through her website as well.

Viking knit chain
 
Crocheted apple tree
The chain pictured here is made with the 1/4" tool and 28 gauge wire.  I covered the cabochon with a free form crochet frame made with 26 gauge wire.  I've added the apple tree using 2.5mm Swarovski bicones in olive and siam.   I created the design as I went and it was an enjoyable project. 

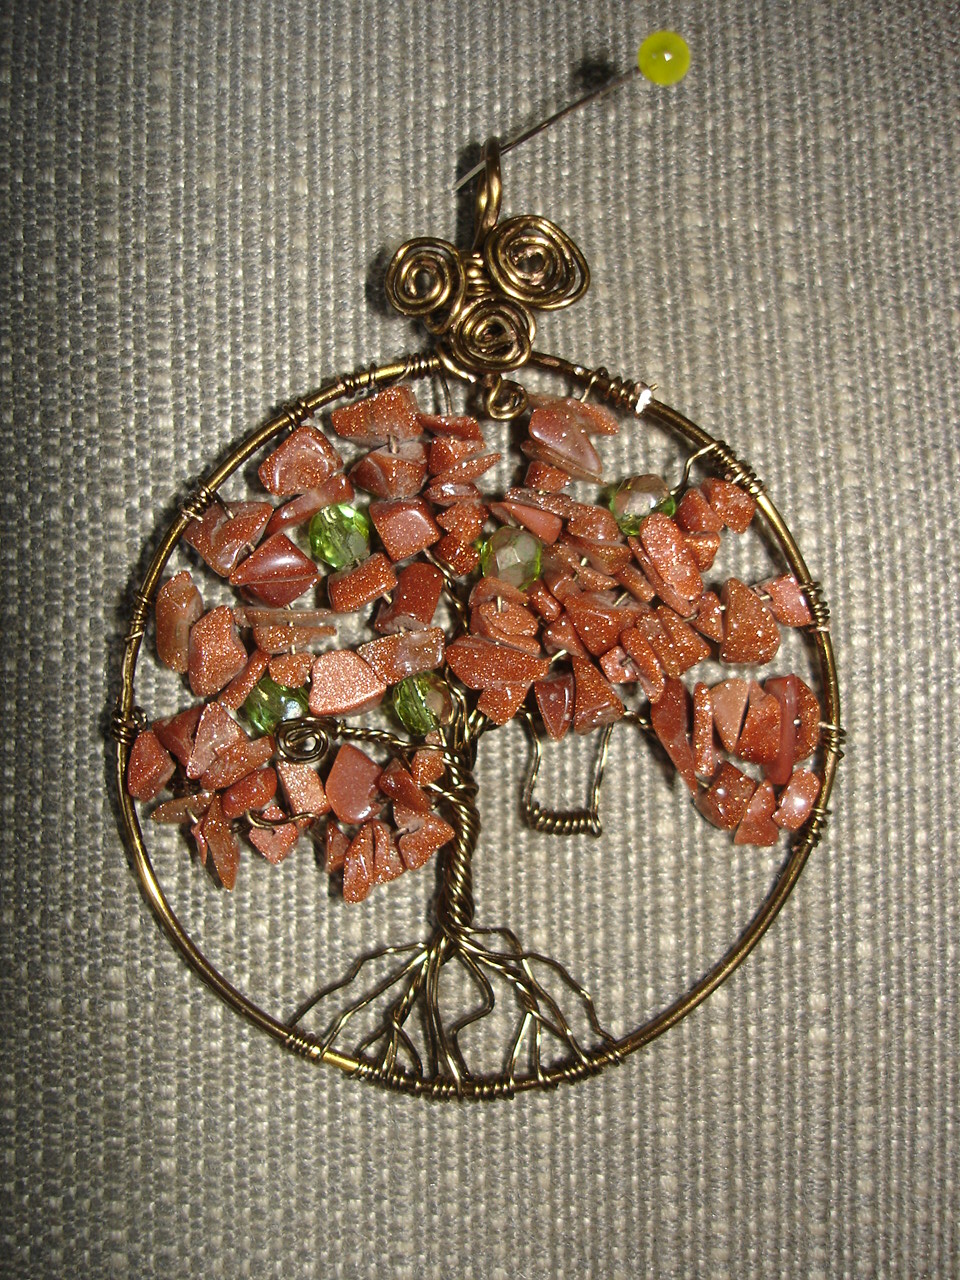
Tree of life pendant
I took a class at the Brazoria Library's bead club.  It was a fun project creating another tree.  It's wonderful to have willing teachers to share their knowledge.

Bird nest pendant
Last month I took a class at the Bead Attic, our local bead shop.  We made this cute bird nest pendant.

After completing my crazy quilt I seem to have lost my creativity.  I'm hoping it will return soon.  In the meantime I am thoroughly enjoying my new source of creativity.

Monday, May 13, 2013

Learning to Wire Wrap Cabochons

Picture Jasper
My wonderful son has given me many beautiful cabochons over the past few years and I am just now attempting to learn how to wire-wrap them.

One of my dear crazy quilt "sisters" offered to give me some lessons so I thought I would share my work.

Picture jasper - back view
Lois got me "hooked" when she offered to wrap one of my cabochons. Jason had given me this picture jasper several years ago, and it was one of my favorites.  Pictured here is the exquisite work she did for me.

The back of the cab is almost as beautiful as the front as you can see in this photo.


Chinese Green Turquoise
I chose this Chinese green turquoise for my first attempt.  Although I had lots of help from Lois, I am pleased with the work I contributed.


It's very difficult for me to wrap those 4 wires and have all those tiny wraps uniform.  If I just had one more hand I think I could do a better job.  I've added some Swarovski bicones and bronze seed beads and wrapped it in a vintage bronze.

Turquoise

I did this turquoise piece for my second attempt.  I'm not as pleased with how I shaped my wires so I will probably redo it.  I need a lot more practice with designing my wires.

Jason was in South Africa last year on business and brought back a gorgeous tiger's eye cabochon.  I'm working toward getting good enough to wrap that one.

Sunday, February 10, 2013

Sunrise on Surfside Beach

Once again several friends got together for a week of stitching and relaxing on the beach. I wouldn't be surprised if neighbors sell tickets for opening day.

What a sight it must be to see eight women with all their crazy quilting supplies, Ott lights, food for a week,  and suitcases converge on this small house. It's a perfect setting for a perfect week!

I wanted to share several photos. The sunrises and sunsets are spectacular. All we have to do is walk out on the back deck and view the splendor. It reminds me of the hymn "For the Beauty of the Earth." I am indeed grateful to God for the "glories of the skies."

One of the girls issued a challenge after one of her walks on the beach. She came back with a number of the butter clam shells and suggested we make pincushions. I had no idea what I would do until I got into the project.

I've glued a magnet in the bottom of the shell and covered it with a tiny cushion made with Hanah silk velvet. I've added a few tiny shells and a turtle charm. The tiny shell is probably about 2" wide. It was loads of fun and I wanted to share a photo of the finished project.

Crazy quilters can embellish anything, can't they?

Wednesday, November 7, 2012

My Crazy Quilted Collar


What a great feeling to finish another crazy quilt project.  This is my second collar using the beautiful Gooseberry Hills pattern.  I absolutely love the design with the offset panels in the front and the off-center back. 
 
I've always wanted to do some project using only Kreinik metallic threads.   Those who know me well, know this is my very favorite thread.  With this black and gold background  I thought this would be the perfect project.  I have also used the Kreinik Serica and Bella silk threads to create the row on tiny embroidered flowers on the left front panel.
 
Many crazy quilters love the sparkle and glitz that can be achieved with all those bright and shiny embellishments.  The Kreinik metallics provide the perfect seam treatment to accomplish this.
 
I've also incorporated several beautiful things that have been given to me over the years.  I am so fortunate to have many talented and generous friends. 


Saturday, August 11, 2012

Woven Embroidery

      I'm always looking for a new embroidery design  and recently found this while searching the internet.  I'm sure I haven't done it exactly right but I do like the look of the woven threads.

I've used a #4 Kreinik very fine braid.  The designer button in the center is the perfect touch and matches the thread exactly.  The button was a gift from a friend and had been in my "stash." for several years.  It couldn't be more perfect.

I've used an awl to make a hole for the shank of the button.  A 1/4" plastic ring secures it on the reverse side and allows the button to lie flush against the fabric.


Wednesday, August 8, 2012

"A Crazy Year in Texas"

I  cannot believe I'm almost finished with my very first crazy quilt design.  I call it "A Crazy Year in Texas" but it's actually two crazy years.  I began on July 12, 2010.   My local crazy quilt bee and several other friends have been stitching along side me and testing my patterns and instructions.  I wish you could see all the work these amazing ladies have done.  With each one adding their own personal touch and interpretation, no two blocks are alike.

I would love to list all my favorite tools, products, threads, ribbons, etc. but space does not permit that.  Some of my very favorites include:  Kreinik Threads, Hanah Silks, Carole Sample's Dream-a-Seam templates, Connie James' Diva Custom Cordmaker, Sulky Heat-away and my Igolochkoy Russian punch needle.  A very special thank-you to Linda in New Mexico for creating the beautiful tatted ghosts and crinoline ladies.

All that remains is the final assembly, tying and adding the mitered three inch borders.  This is the part that really strikes fear.  Crazy quilting is forgiving. There is no such thing as a mistake - just an opportunity for embellishing.   If I make a "mistake" I can always cover it with a silk ribbon motif and you will never know it's there.

Mitering those corners and stitching everything together isn't that forgiving when mistakes are made.  So wish me luck.


Wednesday, July 25, 2012

MIA Once Again


When life gets busy I seem to forget my blog and I always regret doing that.  I will try to do better.  I logged on today to retrieve some photos.   I ruined my laptop last week by accidentally spilling water onto the keyboard.  I have many photos of my work saved here as well as in Webshots

While browsing around and surfing with Google I noticed some of my work had been posted on Pinterest.  One member stated she would like to make the silk flowers in the photo so I thought I would post some directions. 

I saw flowers similar to these on a very old vintage crazy quilt and loved them.   They reminded me of the yo-yo's we used to make so I began my experimenting.  I found if I made a slight oval instead of a round circle it worked better as a petal.  It's also necessary to gather them extremely loose and allow the silk to fall into place.   I call them my yo-yo roses.

I love working with silk, especially the Hanah silk ribbons; they are as lightweight as a feather and easy to manipulate.  You can use any lightweight silk (habatoi or blouse weight but not as heavy as dupioni.)  You can often find silk blouses at a resale shop and use this silk for flower designs.

Start by cutting out five pieces of silk by the oval pictured below.  It should measure approximately 2 1/8" by 1 3/4".  With each of the 5 pieces fold the raw edges inward, approximately 1/4", to wrong side of fabric and stitch with a running stitch in a matching thread.  Pull thread and gather each oval very loosely.

Draw a center onto your fabric at the proper placement.  I use a blue disappearing pen.  With the first gathered yo-yo, tack one of the longer edges to the outside edge of the drawn center.  Tack the opposite edge directly across.  Loosely work the side edges of the oval into place being sure to hide your gathering stitches as much as possible.  Tack in several places.  Add the remaining four petals.

In order to gauge the size of your center make the 5 gathered petals and lay them in place.  You will be able to see the exact size your flower will be and know what size center looks best.

I like to fill the center with beads and add several silk leaves.  I burnish the edges of the leaves to prevent fraying and use a fine metallic gold featherstitch to attach them.

I hope you will enjoy experimenting and making the flowers.  Remember to let the silk drape into place and do not pull the petals so they appear taunt.

Wednesday, March 21, 2012

Hydrangeas in May

I enjoy working with the Sulky Heat-Away and have used this product to make the fence pictured here. It is my understanding they have discontinued the fiber and will only produce the film.

I enjoy using the woven fiber since it works beautifully in a hoop and have not tried the film.

I love the look of the hydrangea growing along the fence line. I was told the soil determines the color of the blossom and all those colors could not grow in the same place. I have chosen to ignore this basic fact and allow my "artistic license" to have free reign. I've used this motif on my May block of the month.

I was introduced to the Sulky Heat-Away product by Valerie Hearder. I had the pleasure of interviewing her and doing a book review in CQMagOnline.com She has an amazing talent and I was so pleased to learn this lovely technique.

Friday, March 9, 2012

Creating with Kreinik Silk Serica


I've been experimenting today with a new flower for my November block of the month. Kreinik has some beautiful silk threads and I chose one of them for this particular flower.

It was an all day project but I'm really pleased with the completed flowers. I've done three in this motif with each one measuring 1 1/4" in diameter.

The leaves are made with 4mm silk ribbon and the fly stitch.

Thursday, March 1, 2012

The Joy of Creating

I love to create beginning with an almost blank slate. In this particular case it was three pieces of white silk in various patterns, weights and textures. The goal I had in mind was a free-form poinsettia for my December block of the month.

Most importantly in the process was dyeing these silks in those perfect colors I love and enjoy working with. Ozecraft dyes are one of my favorites and I've recently found a great online site for ordering. To achieve the exact color, I'll pull in several different products, however, including Rit dye.

Perhaps the more challenging part is taking that poinsettia you've drawn on paper and pulling apart each individual piece and creating a puzzle with the silk pieces. And of course, the absolute joy and satisfaction that's found in putting it all back together again.

The silks are dyed, the puzzle pieces are cut and it's just waiting for me to stitch it in place. In fact, this poinsettia is just another "almost blank slate" waiting to be stitched down with the perfect threads. The beauty of the poinsettia will come alive on fabric with the completion of the stamen. Of course, the final step is finding the perfect beads and threads to accomplish this.

I've not strictly adhered to the "rules" of crazy quilting or silk ribbon embroidery for that matter. All twelve of my blocks were meant to be a challenge to me in addition to a canvas of all the many things I've learned over the past eleven years I've crazy quilted.

Friday, February 24, 2012

Has it Been That Long? Surely Not!

What a surprise to see the numbers of months that have passed since I last posted. Time has a way of passing far more quickly than one imagines. In my defense I will say I've been busy creating and stitching.

In July, 2010 I started designing and creating a crazy quilted block of the month. I've always wanted to do this but was never quite sure of my ability to accomplish such a huge task. It's been a fun and rewarding journey and I am pleased to say that I am definitely going to complete the project.

I am beyond excited to be finishing with November and starting on December. I've named it "A Crazy Year in Texas" and it depicts the seasons, holidays and celebrations of my native state.

My local Crazy Quilt Bee has been so supportive in stitching along with me and testing my patterns. It would have been impossible without their encouragement and I'm so thankful to each of them.

You can see the January block in the current issue of CQMagOnline.com It was the most difficult block to do and my least favorite. I love flowers and nothing blooms in January!

February gave me the freedom to create those tiny flowers so I took full advantage of the opportunity. Pictured here are two hearts totally encrusted with all those flowers I couldn't use in January. After finishing the hearts I appliqued them to the block.

I've had a number of requests for the patterns so that's my next major task. The idea of marketing my creation is an exciting challenge but I've come full circle and back to the question of whether I can accomplish such a daunting task.

Monday, April 11, 2011

Embellished Block for Sendai


It was such a joy to work on this block and I did some of my favorite motifs and seam treatments. I cannot make a block without roses - that's just a given.

I've added a tiny Swarovski butterfly necklace on the lower right side of the block.

I enjoy the French knot roses and have made these out of 4mm silk ribbon. The fly stitch fans are made with Kreinik fine braid.

The pyramids are stitched with Kreinik thread and Carole Samples Dream-A-Seam Templates. When you want to have a seam treatment evenly placed and uniform, these templates are a wonderful tool.

Tiny clusters of grapes are also a favorite seam treatment and I've used a grouping of these. I took a beading class in Omaha, Nebraska quite a few years ago and learned how to made the tiny inchworm. He's a definite favorite.

The little yellow bee is a vintage bead and I've used Kreinik Easter Grass for the wings. I love the iridescent look it gives.

I've added a beaded dragonfly as well along with a tiny branch of leaves and lucite flowers.

I loved making this block and with it I extend my prayers for the people of Japan.

Wednesday, April 6, 2011

BLOCK FOR SENDAI


I've finishing piecing my block and started some of the embellishing. Let me begin by saying I hope it's acceptable. I have a very hard time working with jewel tones and I'm hoping my yellow, topaz and greens will fit in.

I had a gorgeous antique kimono piece that was given to me years ago and I wanted to use it for the center focal point. I remembered a block my dear friend Julie had done for an issue of CQMagOnline and decided to use that for my inspiration in piecing the block.

It's a simple matter of drawing a puzzle. First determine the size of your center focal piece. Whether it's a piece of fabric or a silk print as Julie has used, make sure you allow at least 1/4" around the motif for your seam allowance.

I knew Leslie had asked for a 9" block so I cut my drawing paper that size and centered my motif. Using my ruler I drew various size pieces starting at the motif and ending at the edge of my block.

The next step is numbering your pieces - that's really important. I marked the outside edges of the pieces and then cut them out. You will need to allow a seam allowance for all sides except those you marked as outer edges.

Using a 9" square piece of flannel I stitched the motif down with a basting stitch and then started putting my fabric puzzle together using the sew and flip method. I always iron each piece as it's added. I attached the first and last piece together by turning under the seam allowance and appliqueing it in place.

All that's left is turning under the seam allowance circling your motif and appliqueing in place. When you've pressed it really well your block is ready to embellish. I've used a piece of tatting followed by a beaded Mokuba trim around the center piece.

Now all that's left is the fun part of embellishing. I don't have a lot of area to work with since we are only embellishing the inner 8" but that's no problem.

I find such pleasure in doing special projects like this and encourage all of you to join in. Read my post below and visit Leslie's blog to find all the details.

Note: I am a dedicated user and true lover of Kreinik threads. I was so honored when Dena asked that I write a guest article for their blog. I invite you to log on and read my article. Be sure to bookmark and read the Kreinik Thread Blog routinely - you will find some wonderful tips and also be the first to find out about new products. I love the Easter Grass!

Wednesday, March 30, 2011

Giving from the Heart

I have always found the blessings are abundant when you give of your time and talent for others in need. Leslie of Pinyon Creek Stitchin'! is coordinating "Hearts and Hands for Sendai." Please log onto her blog and read all about this wonderful project and the requirements. Be sure to arrow down and read the March 14th. post for all the details. Please consider joining in and contributing a block.

Here is a portion of Leslie's post that tells a little about the project:

"This project will be dedicated to helping those affected by the earthquake tsunami disaster in Japan. Per Hideko Ishida's request, all quilts will become a part of an exhibit in Japan where money will be raised by viewing the quilts. Ultimately, these quilts may be auctioned and the proceeds given to a charity designated by Hideko Ishida, our Japanese CQ Sister! We will keep everyone informed as time progresses. This project is open to the quilting community at large!"

Saturday, March 26, 2011

Crazy Quilting in the Texas Hill Country

Myself along with several of my crazy quilt "sisters" were invited to spend Spring Break in the Hill Country of Texas. Julie of Creative Blessings of Joy planned a fabulous stitching retreat at her brother & sister-in-law's gorgeous home. Built on the top of one of the hills, it overlooks the lake and the scenery is breathtaking.

We have these retreats down to a fine art and there is only one thing we can do better... create a mess! On the right is Jan showing one of the blocks she is currently working on. As you can see, we come prepared with our stitching paraphernalia. Julie, seated, and Linda, standing, are both taking a break in this photo.

The photo on the left shows Gumbo giving Julie a "high five." I could fill this post with pictures of this sweet dog. You can probably tell I love animals and I thoroughly enjoyed interacting with Gumbo, the family's beautiful Australian Labradoodle.

We spent the day shopping in Kerrville and Fredericksburg and Julie,
Lynnis and Jan needed a nice dip in the hot tub to soothe their tired muscles. Gumbo, is waiting patiently to be splashed in the face.


Their Mountain Laurel was in full bloom and absolutely beautiful. The antique roses were just beginning to bud out and I found one partially opened bud. Spring is coming to Texas!

A special "thank you" to Julie's wonderful family for their gracious hospitality. We had a wonderful time stitching in their lovely home and enjoying all the beauty of the Texas Hill Country.

Wednesday, March 23, 2011

THANK YOU, THANK YOU, THANK YOU

I wanted to express my sincere thanks for the wonderful gifts I received from this year's One World One Heart event. If you have not heard of this yearly event please check Lisa's blog, The Whimsical Bohemian, for more information. On the top right sidebar you will see a place to sign in.

I've participated for the last two years and have met so many wonderful and talented bloggers. It's fun to both give and receive. Thank you, Lisa, for creating this event and for the wonderful opportunity it provides.

Can you believe I was the lucky recipient of four gifts? Each one is a treasure and I feel so very fortunate. The beautiful smoky quartz bracelet and handmade bag on the left is a gift from Diane of Lavender Dreams Thank you once again, Diane.

Pictured on the right are a number of lovely hand-crafted beads by Jennifer of Jewelry by Jennifer Pride I will enjoy using them, Jennifer - many thanks!


I was amazed at the bead work on this beautiful doll. This was a gift from Dot of Speediebeadie . She loves her new home and has her very own place of importance. Thank you Dot!


And last, but certainly not least, is this gorgeous hand-crafted journal by Jen of Jenxo. This is great for drawing my designs and I will use it often. Thank you again Jen for your generosity.

Wednesday, February 23, 2011

Saying Goodbye to our Mary


Our crazy quilt group has lost a dear and talented "sister." Mary was a gifted artist and her talent unequaled. She was able to create in any form of needle art and loved to recreate the beauty around her onto fabric. She was a gifted artist in oils as well and her paintings are magnificient.

Her last crazy quilt was "The Mighty Oak." Her inspiration was taken from one of the Piecemaker Calendars and she added her very own touch of Texas in each of the blocks. She entered our local Quilt Show the year it was completed and won every ribbon. It was a true work of art!

We are planning an article for CQMagOnline.com in memory of Mary and have permission to include photos of "The Mighty Oak." You will want to log on in April - you will truly be inspired as we have been. We will miss Mary but her presence lives on through all the many treasures she has created.

CQMagOnline is a quarterly publication and absolutely free to anyone who would like to look through the articles. Just click on the live link and then "current issue." I would be remiss if I didn't thank Rissa, our editor, for her dedication. It has been a wonderful resource for crazy quilting for many years