Monday, January 28, 2008

An Enjoyable Week of Stitching

This past week has been a productive one. I feel as though I've made progress and thoroughly enjoyed myself in the process.

I put the finishing touches on Connie's purse and mailed it to her. She has a show coming up soon in Tucson, Arizona and I hope she enjoys her neck purse. She has created a great product and I've found so many wonderful uses for it. McCalls Quilting Magazine has an article on Connie's cordmaker in the March/April issue due out soon.

My landscape is complete except for the backing and binding which can wait until a later date. What fun I've had with this project! "Points of View" by Valerie Hearder is an excellent book with many new and fascinating concepts. Her instructions and explanations are thorough and concise and definitely a "must read."

My final addition to the landscape was my fence and I really looked forward to trying the "vanishing muslin." I drew my fence layout with a pencil onto the fabric and then began my free motion stitching. This was my first project using the muslin and I put more stitching than necessary but I'm pleased with the results.

With a hot iron I pressed the fence and was totally impressed when the fabric began to turn a dark gray and disintegrate. My mind began to swirl with other ideas for using this neat product. If you would like to experiment you can purchase a product called Heat Away by Sulky.My next landscape will be a Texas one complete with a field of Indian paintbrush, bluebonnets and buttercups. The trees will definitely have moss hanging from them and I know I can make that authentic by using the vanishing muslin.

The picture below is taken in the yard of my dear friend, Lynnis. I love the way the moss hangs from the trees. On the right is a field bluebonnets

And now to my current project....two blocks for our 2008 wall hanging for cancer awareness. We currently have ten blocks in progress and another ten will be created. Be sure and check out the Flickr site to watch the "works in progress." It's fun to see the pieced blocks begin to evolve into mini works of art as embellishments are added. How very creative these wonderful ladies are! While you are at the Flickr site be sure and check out the 2007 wall hanging.

I wanted to applique a large butterfly to this first block and used a fabric given to me by my dear friend, Melanie. A friend had recently returned from India and brought a number of beautiful fabrics and embellishments back and Melanie shared this wonderful piece. It's really close to the color of my background fabric but I was determined to use this beautiful piece.

I put a layer of high loft batting behind it and then used a gold feather stitch to tack it down. I didn't like the flat body and remembered a class I had taken at the Houston Quilt Market. Diane Ricks with Artemis silks had taught a butterfly pattern and the body was a separate piece. I drew one out the size of my butterfly and added it last night. I'm pleased with how it looks so now it's time for the embellishments.

I don't know exactly what I will do but plan to use beads and Kreinik metallics threads to embellish the wings. I will definitely do a beaded picot edging around the entire butterfly. I think this will help in setting it apart from the background.

On the left is a picture of my second block. It's pieced and ready for embellishments.

There are several in our group who are blogging the progress of their blocks. I will try and post some of their sites later.

Wednesday, January 23, 2008

Meet my Wonderful Friends

I always look forward to Tuesday because that's the day our CQ group meets and stitches all day. We have eleven members in our Bee and everyone is an accomplished stitcher. For years we met from 10 am until 12 noon. Last year we decided to extend our day so we stitch until 4 pm. There are times we aren't ready to leave then. I'm very blessed to have such a special group of CQ sisters.

These pictures were taken yesterday at our meeting. Sitting around the table from left to right
are Dolores, Lynn, Julie, Chris, Jan, Melanie, Linda and Lynnis. Jan is responsible for creating the CQ addicts that we all are. Each one of us, except Lynn, took her class in crazy quilting and followed up by joining the Bee. We met Lynn in a local beading group and adopted her. She does beautiful beaded jewelry and scarves on the knitting looms.

Lynnis is making a book cover to give to her granddaughter (picture on the left.) The book is one she received as a child. I know this will be a special treasure and heirloom. Lynnis is known for her hollyhocks, roses, and chrysanthemums. She refers to herself as "bigfoot" since her motifs are sometimes large. They may be large but they are also stunning!

Lynnis is also an avid beader and has some fabulous pieces of jewelry and cabochons.

Jan is our esteemed leader. She has done some wonderful quilts and won a number of ribbons at our local quilt shows. She organized our Bee and I will be forever grateful to her for introducing me to all these wonderful ladies. I've chosen a block she has made for our silk book project. In 2005 we decided to make 2 pages for each member in our group and then exchange. You can read more about it and see the pages I received in the January issue of CQMagOnline due out by the end of this month. I've called the article "Forever Friends."


Julie, known as Jules to most of you in the blogging world, is a wonderful artist and so creative in what she does. She is also my "partner in crime" at the Houston International Quilt Market and Festival. I've chosen one picture to post but invite you to check her blog, Creative Blessings of Joy" for all her other wonderful projects. Her blog is creative, informative and inspirational.

Chris is our newest member and has completed her piecing on the first project which will be a needlecase. I don't have any pictures but will take one when she has finished.

Linda has been with our group for over a year. Her husband says she is a "collector of inventory" rather than a crazy quilter. This isn't totally true - she does some beautiful work. This is a block she created for a wall hanging we made and presented to Premier Estates. We hold a retreat here several times a year and it is perfect for our needs. We are scheduled for our next one the first of February and we're really looking forward to it.

Linda is also an avid beader. I've seen several of her oil paintings and she is a great artist!

Dolores is a wonderful seamstress, crazy quilter, and beader. I've chosen the page she made for me in our silk book project I mentioned earlier. Notice the antique buds and bows trim(picture on the left.) She used it on my block because I really love that trim. She found it at one of the nearby antique shows. I've looked for this trim for years and have never found it.


The picture I've chosen from Melanie's work is the tree she made for the Texas Wall hanging project. She dyed many yards of 2mm silk ribbon to make all the French knots. Isn't it great! Her husband wanted to keep the block and was a little upset that she donated it for this project. I can only imagine the time it took to make this tree.


Maureen's work is always so delicate and detailed. She has designed several wonderful projects and we are always thrilled when she has a new one to show us. Pictured below is the page she made for me in our silk book project.


Claudette is another member of our group and best known for her Brazilian Embroidery. Julie did an article about her in one of the back issues of CQMagOnline. Her work is so creative and we are always amazed with her beautiful projects. This is a mouse pin cushion she made. I love the embroidery she has done on this. I believe she found the pattern for this project from a magazine article.

I've told our group that we could publish a book with all the crazy quilting we have done. Our group is definitely productive. I hope you've enjoyed seeing some of their beautiful work.

Below is the Texas Wall Hanging we did for Premier Estates. We finished each block and then I tied them together with an authentic hangman's noose. Very Texas!

Monday, January 21, 2008

Sharing our Love of Crazy Quilting & Fabric Art


I've definitely been in the mood to stitch and thought I would share some of the results. One of my most rewarding projects is working with Victoria Adams Brown and coordinating a yearly wall hanging. This began as an outgrowth of Vic's Way to Women's Wellness Foundation. It is our hope that our art will bring awareness to the issues of breast cancer. The projects are on display for a period of time and then presented to a clinic or research center.

It's such a joy to work with these wonderful crazy quilters and fabric artists from various locations around the world. We've developed a great friendship and love to share our joy of stitching with others.

Three years ago we did a wall hanging which was presented to the Arrington Cancer Center in Lubbock, TX. The above picture is one of the blocks I made for this wall hanging. We always suggest several colors to work with. In doing this we find our blocks always blend beautifully.


Last year we created another beautiful wall hanging. These are two blocks I made for that project. We suggested purples for this wall hanging and our theme was hearts.


We are now in the process of creating our third wall hanging. We've decided to use butterflies as our theme and work with yellows, peach, ecru and some periwinkle. I've pieced two blocks for this project and these are my bare blocks.

This one has the paper pattern for the butterfly I plan to use. I will use silk to cut out the wings and then applique those onto the block and then embellish. My picture is a little dark and doesn't show the true colors of the fabric.


The second one has a machine embroidered butterfly stitched by a friend. I always say the fun part is embellishing so I look forward to working on these two blocks.

If you would like to follow the progress of all the blocks please check our Flickr site. As our blocks are pieced we will post them along with the progress. We always enjoy watching the blocks evolve into a finished piece and ultimately the finished wall hanging.


One last project I've been working on is a neck purse for Connie James with Fibergoddess. I've placed my own name tag to show how it fits inside the plastic cover. I've used her Diva Custom Cordmaker and some of her beautiful fibers to make the strap.

Thursday, January 17, 2008

Landscape Quilts


I had the privilege of meeting Valerie Hearder at the Houston International Quilt Festival. She is the author of "POINTS OF VIEW Landscape Quilts to Stitch and Embellish" published by Martingale & Company. Valerie's work is so inspiring and her book is beautifully done. I immediately began collecting the things I would need to begin my own journey in landscaping.

I invite you to read my artist profile of Valerie in this month's issue of CQMagOnline and learn more about her career in textile arts. She is a gifted artist with the ability to share her knowledge with clear and concise directions.

I've started my landscape and I'm so excited with the potential for embellishing. Being a crazy quilter, I couldn't help adding a piece of dupioni silk and velvet along with the beautiful batiks. You will have to use your imagination to see the large oak tree on the left side. There will have to be a fence on the right side with silk roses hanging from it. Valerie has a wonderful technique in her book for stitching a fence that I plan to use. I can't seem to get a good picture of my landscape - it isn't as dark as it appears here.

Here is a portion of the fabrics I've collected. I also have some African sun prints by Langa Lapu that I plan to use in other landscape projects.

Most of the supplies you see in the picture below are available at Valerie's website. My next step is to paint the sky. I've selected a piece of white moire. I think it will add a nice texture and appearance. It's been years since I've painted so I'm questioning my ability to accomplish this step.

In the April issue of CQMagOnline I hope to have this project finished. I'll share my experiences and pictures of my finished landscape. I started to say "masterpiece" but that might be setting myself up for failure.

In my mind's eye I can see this finished landscape. Now to have my hands do what my mind sees.

Sunday, January 13, 2008

Life on the Water


One of the nice things about living on the water is being able to enjoy the wonders of nature. Being awaken by the sounds of birds rather than the noise of traffic is wonderful. Although we are only a few miles from town, we are able to enjoy a quiet lifestyle.

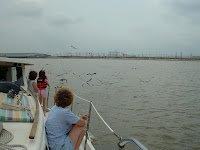
I thought I would share some pictures of life on the Texas Gulf Coast. We've taken friends out for the day and Kristen is enjoying feeding the seagulls. I'm the one with the white blouse and windblown hair.

When the seagulls realize you have food they can become quite aggressive. They will even come close enough to take food from your hand. The wingspan is amazing on these beautiful birds!

Another interesting bird is the black skimmers. Back in the late 1960's a flock of skimmers decided to nest in one of the Dow Chemical Company parking lots. The company and it's employees roped off the area and allowed the birds to lay their eggs and raise their young.

Every year since then the flock migrates to the area in the Spring. What began as a flock of 38 birds has grown to more than 1500 (official record in 2003.) The company holds tours each year allowing visitors to see the nesting area.

The fascinating thing about the birds is the way they feed. We've been out in the boat late in the evening and been able to watch them as they skim the water for fish. It's my understanding they are the only birds who feed in this manner.

Although I'm not an avid birdwatcher I do enjoy seeing these beautiful creatures that God has created.

One last picture of a pelican standing on the beach. I guess he's waiting for the waves to wash up a tasty morsel at his feet.

Friday, January 11, 2008

Strawberries in all sizes...


Dear friend and local crazy quilter, Julie Yonge, created a beautiful velvet strawberry and some of us became addicted to making them. I thought I would show you several I've made. This one is made from a pattern published by Crabapple Hill Studio. The large strawberry measures 6" long and includes a small needlecase and the velvet strawberry needle sharpener.


This strawberry measures 3" long and includes a tiny green Hanah silk velvet one. I've found the best way to make a strawberry the size you want is to cut out a pie-shaped wedge from muslin. With right sides together, stitch the two edges together and reverse. When you find the size you like cut your wedge from velvet. I use the muslin one as an insert to hold the emery. You will want to insert the muslin inside the velvet piece before adding the emery. Gather the top of the muslin strawberry and secure with knot. Then repeat for the outside velvet strawberry. Add the leaves, silk ribbon embroidery and DMC cord.


I still wanted to make strawberries but I wanted something a little different. I decided to bead the leaves with #11 & #15 seed beads. Another dear friend and fellow boater, Debi Nielson, beaded the stem that's attached.

Speaking of Debi....I introduced her to beading and she was an instant pro! This is the ArtBra she helped me create for 2007. We called it "Opposites Attract." It was the story of Oscar the Ostracized Ostrich and Francesca the Flamboyant Flamingo. Debi's work was certainly creative and original. She had me draw what I wanted on paper and she recreated it in beads. We received the honor of being February in the 2007 ArtBra Calendar created by Victoria Adams Brown.

I did a free form crochet for the entire surface of the bra and straps. There were rolled roses, of course, and grass made with hand-dyed silk. I love participating in these wonderful projects that raise money for special needs. The proceeds from calendar sales were donated for breast cancer research. I've told Vic a number of times that she will receive many stars in her crown for the wonderful work she does for others.

Wednesday, January 9, 2008

Ideas and Inspiration


I am always intrigued with new concepts and ideas for embellishing my crazy quilt projects. With that in mind, I issued an Idea and Inspiration Challenge in the October issue of CQMagOnline. I received some great ideas which will be published in the upcoming issue at the end of this month.

The above picture is one I used to introduce the project. I love to use the tiny drop beads and cluster them like grapes. Used in odd numbers they add that certain sparkle and also dimension to your crazy quilting.

This picture on the right shows a seam using the 3mm cupped sequins available online through Cartwright. It's a very simple seam and the small sequins work great clustered together.

If you are interested in participating in our Idea and Inspiration challenge, I would welcome your input. This will be an ongoing project for as long as our readers submit their work. I ask that you send a picture of your favorite seam treatments and motifs, along with brief instructions on how they was done. If you can include the type ribbon, thread, color number, etc. that would be wonderful. In doing the article I would like to not only introduce our readers to new ideas but also the vast array of beautiful embellishments at our disposal.

By clicking on my name in the October article you will be able to email and send me your ideas. I hope to hear from many of you. The January issue will be available at the end of the month. You will want to log on and take a look at the wonderful work submitted by our readers.

Monday, January 7, 2008

Burning Silk Leaves

I thought I would answer those who asked how I burn my silk petals and leaves. I have to credit my dear friend and mentor, Victoria Adams Brown, for introducing me to the technique. I took a class on the small Victorian bag pictured here. She hand-dyed the beautiful silk and we cut wings for the butterfly and burned the edges with candles.

The class was in Omaha, quite a few years ago, and I've been experimenting ever since. I've used matches, butane fire starters, textile burning tool and the soldering iron pictured here. All of the above are very hot so please use caution.
You can trace and cut out a leaf design like the grape leaf on the left or freehand a leaf. I've used the soldering iron pictured and burned the outside edges. It gives a stiffness to the leaf that allows it to hold it's shape when stitched down. I like to use a back stitch or tiny feather stitch in green or gold.

If you push up a tiny gather as you're stitching the leaf in place it will give an additional dimension to the leaf.

In the picture below I've used the grape leaf along with 4mm silk ribbon French knots, beads, and tendrils. The second picture is a section of my ArtBra design for 2007. The leaves were hand-dyed and then highlights were added with a paint brush. I really enjoyed making this bra. I hand-dyed the silk for the grapes as well. They were stuffed with fiberfill and then sewn together with beads. This allowed them to hang as clusters. This particular cluster was stitched to the left cup of the bra.

I currently design for Artemis/Hanah Silks and will soon have four designs published using their beautiful silks. Two of these use the burning technique shown here. I had the pleasure of demonstrating my rose design at the Houston International Quilt Market this year.

Sunday, January 6, 2008

Gifts from the hands and hearts of others


I always love receiving gifts that are created by hand. I know how much time and creativity went into making them and they are truly treasures from the heart. I have a wonderful sister, Dorothy, who crochets beautifully. She gave me this wonderful poncho for Christmas and I love it. With our sub-tropical climate we rarely need anything heavier.


Another treasure is my Christmas earrings made by my dear friend, Linda. The Christmas trees are made with Swarovski daisy spacers in 4 sizes. The snowmen are also Swarovski crystals.


Several years ago another dear friend, Barb E., made this bobbin lace angel for me. It's a gift I will always treasure. I can only imagine the time it took to create this wonderful piece of art.


And the last special gift for today is pictured below. The delicate hand-blown glass icicles were a gift from artist and friend, Terry Albright

Saturday, January 5, 2008

Today is Beading Day

Although crazy quilting and silk ribbon embroidery is my first love, I also enjoy beading. Who could resist all those bright and sparkling gems? For the past two years Jason has given me some beautiful cabochons for Christmas. Today I thought I would share some pictures of several.

This year he gave me this gorgeous stromatolite from England said to be 2 billion years old. Stromatolite is colonies of algae that are the earliest known living organisms in fossil record. Sometimes it's referred to as "landscape marble" because the algae colonies look like an outdoor landscape. The back is just as beautiful as the front which I found really unusual.


Last year he gave me a beautiful unakite jasper cabochon. I've made the 2-strand necklace pictured here. I've done a peyote stitch bezel around the stone. The necklace has fresh water pearls, Czech glass leaves and Swarovski crystals.


Many thanks to all of you who have welcomed me to the blogging world. I appreciate your kind words and compliments on my work. Specials thanks to my dear friends Julie, Judith and Allie for spreading the word through their blogs.

I'm enjoying my adventure and look forward to browsing through blogs on a daily basis. I love all the wonderful ideas and inspiration.

Friday, January 4, 2008

The Paris Wall hanging for my son

In January, 2007 I started the Paris wall hanging for my son, Jason. I knew whatever I did needed to be more masculine than my usual flowers so I was definitely "out of my box." I did have an idea, however, and began by drawing it on paper. A fiber tree would start in the bottom right block and end in the top left. One of twelve scenes from Paris snapshots would be reproduced on silk in sepia tones and placed on each block.

I pieced 12 blocks and drew my tree design. Now it was time to begin making my tree. One of my very favorite tools is the Diva Custom Cord maker. I selected the fibers I wanted to use plus one strand of beads for sparkle. Layout was important and leaving enough cord to continue the tree when the blocks were stitched together had to be taken into consideration.

With the trunk stitched in place it was time to begin attaching leaves. I dyed silk in three shades, cut out the leaves and burned the edges. What a great feeling it was to have all those little leaves stitched down. When the blocks were stitched together I knew I would need additional leaves so those were set aside.

Now for the embellishing...without flowers....almost an impossible task. In September, I put the finishing touches on each block and stitched them together. I attached the mitered borders, backed it in beautiful crushed velvet, and completed it by tying. I gave it to him when we visited in November. A special gift for a very special son.